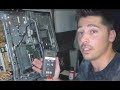
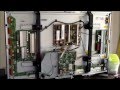
Akai tv repair lct3201ad Dead no power fix! Solution below location # / PARTS ec14 and ec25, all 470mf 35v capacitors ec18, ec19, ec20, all 1000mf 16v caps caps may look ok but tested bad.
2 ways to test bridge rectifiers & checking standby volts on power board, standby volts can be either 5v or 3.3 dc volts even with tv off. bridge rectifiers read .4 to.7 is ok in diode mode on meter.
to reset sony TV 1st unplug all cables from tv and power for 5 minutes but if that reset fails then next is to factory reset by holding TV Remote's "UP" on directional pad while pressing "power" ON THE TV.
Red led light blinks flashes, red light error code troubleshooting Chart,
2 red flashes is bad power board
3 red flashes is bad main or power board
5 red flashes is bad lcd panel connection or internal lcd short- expensive fix
6 red flashes is backlight error check bad main board, power board or inverter boards- unplug one by one to see if tv stays on
7 red flashes is main board over heating
8 red flashes is main board sp prot
11 red flashes is trident IC, bad main board
12 red light flashes is tcon error bad T-con board or bad LCD panel (tv turns off after a minute)
13 red flashing is backlight balance error bad lcd panel or inverter boards (common) or balancer boards on kdl-52v4100 only
14 red flashes is HFR error bad TCON or Bad LCD panel, in this video its bad T-con board.
"how to download update"
Download UPDATES KDL-52W4100 & KDL-52V4100
Sony kdl-52w4100 usb update - http://esupport.sony.com/US/p/model-home.pl?mdl=KDL52W4100&template_id=1®ion_id=1&tab=download#/downloadTab
Sony KDL-52v4100 http://esupport.sony.com/US/p/model-home.pl?mdl=KDL52V4100&template_id=1®ion_id=1&tab=download#/downloadTab
How to fix Plasma TVs repair troubleshooting service guide If you got tv power but no picture, check Y sustain and y buffer scan drive boards. Note: "no standby light" on front of tv can be... bad ac outlet (reset circuit breaker), bad connection on power-cord, just secure plug bad power-board, check for stdby 5v or (3.3v on some TVs) if you have standby volts then lastly bad main logic board. Bad X or Z sustain board will give you color distortion.
How to fix Samsung Plasma TV no picture or clicking noise. Y sustain main board repair kit! Samsung BN96-06086A Y-Main Board Component Repair Kit.
clicking on off can be from few swollen capacitors in power board but sometimes ICs on y buffer boards short and transistors on y main sustain board can go bad time to time so here's a link to fix that issue. Y sustain board repair kit to fix clicking or no tv picture issues.
Common fix for DLP TVs Samsung HL, Mitsubishi WD, Toshiba 57HM167, 65HM167 is DLP chip. Free Samsung TV fix by repair warranty service tech for DLP models HL-P, HL-R, HL-S, HL-T, see link below. In most DLP TVs the lamp goes out first then sometimes capacitors in power board swell up and color wheel goes bad. Also DLP chip in light engine may go bad time to time, sometimes these parts are covered by extended warranty just go to TV brand website. If you have no picture or dots, shadows on screen then suspect it is bad DLP chip. if TV does not turn on it can be bad power board or main logic board. if the DLP light bulb (dlp lamp) in the back vent is NOT lighting up then DLP lamp is bad, just order a lamp for your tv model and install it by opening the small door on the back panel (lamp just slides out & in) . http://www.samsung.com/us/dlptvsettlement/
EW40T4FW, B12083895 Board UF11 repair. EEprom IC chip will fix most no power Westinghouse EW40T4FW TVs. Bad part location on main video board is UF11 (green board). First unplug TV. EEprom can be removed by 30watt solder iron and desoldering wire but don't over heat board. use tweezers to slowly pull out eeprom. when working on TVs work in a static free area like a garage (off rugs and carpet) . i recommend using thin rubber gloves try to hold eeprom's body, don't touch the pins. put new eeprom in by lining up the circle depression in corner of eeprom to the marker dot or stripe on the board. Next solder the pins to board (don't over heat pins on eeprom or board) soldering each pin should only take 1-2 seconds for each pin. Double check your work, make sure solder didn't overflow and solder 2 pins together. Now test your TV. Let us know if it fixes your TV. Share this blog if it does, thanks.
Y-Main Board YSUS Y-Sustain PBA Number: LJ92-01601A PCB Number: LJ41-05905A TV Panel Model: S50HW-YD11 | S50HW-YB04 i suggest getting repair kit, service manual, or just get the y board listed below. y sustain and y buffer boards time to time go bad, capacitors & transistors on heatsink sometimes go bad too. (ymain sustain board and buffer boards displays "scans" the image on tv screen)
to reset audio drivers- 1. click on bottom start button search programs for "SOUND" or right click "Speaker icon" on bottom taskbar 2. click "SOUNDs" click "Playback tab" 3. then right click "Speakers" and "disable" then "enable" 4. and then "set as default" 5. restart pc speaker speaker cable must be in headphone pc port or green pc port. 6. you can uninstall driver if you plan to download latest Audio driver from manufacture website under support section. 7. then restart pc to refresh new audio driver to Windows 7 or 8 8. worse case install new sound card
PS4 BLUE or RED BLINKING LIGHT OF DEATH FAILURE FIX!!! GET UP DATE at website and put on USB drive http://us.playstation.com/support/systemupdates/ps4/index.htm Call SONY SCEA CUSTOMER TECH SUPPORT SERVICE 1800-345-7669 to get update disc! New PS4 troubleshoot repair instructions FIRST- Plug PS4 hdmi cable in all TV's hdmi ports To Reset PS4 click here- ways to reset PS4 and update PS4 using usb drive Common troubleshooting steps Step 1. Call Sony Tech Support to Request Update Disc. 1800-345-7669 Step 2. check HDMI cable is making contact with port. (check for broken parts/bent pins) Step 3. Hold power button till PS4 turns off then Disconnect the power cord from the PS4 for 1 minute then reconnect. Step 4. Turn on TV and select the correct video output for PS4. Step 5. Connect the Controller to the PS4 Console via cable Step 6. Press & Hold the 'PS' button on the controller until the Blue light turns Orange. Step 7. Then Press & Hold PS button (on the controller) again, until the Consoles light turns White. Step 8. Wait for PS4 to turn on & display picture on TV [PS4 Factory Reset] Step 9. Press & Hold Ps button until the console turns off. step 10. Then press & hold PS button until you hear 2 beeps. [Service/Safe Mode] Step11. select restore PS4 and it will Reset PS4 to back to new step12. some had luck taking out hard drive and turning on ps4 but some gamers also just had a loose connection on hard drive. step 13. do "Hard reset" Unplug ALL Cables from PS4 for 10 minutes then connect all cables and powercord old instructions below FIRST- Plug PS4 hdmi cable in all TV's hdmi ports 1. also check hdmi port for metal pins touching inside ps4 hdmi port 2. hold power button to turn off ps4, unplug powercord of ps4 for 1 minute for hard reset. 3. plug in the ps4 controller to PS4 and Hold PS center controller button till blue light turns orange then Again Hold PS button on controller till PS4 light turns White then wait 20 seconds for PS4 to turn ON and display a picture, make sure you are on the correct TV video input. 4. "PS4 Restore factory reset" hold PS4 CENTER POWER BUTTON TILL PS4 TURNS OFF, THEN Again HOLD POWER BUTTON TILL YOU HEAR 2 BEEPS TO ENTER "SERVICE MODE" OR "SAFE MODE" from there you should be able to restore reset PS4. PS4 IS DEFAULTING VIDEO RESOLUTION TO 1080P FULL COLOR AND SOME TVs don't support that. So also try another 1080p hdtv. 5. POP off PS4's top shiny plastic cover check for anything loose like screws secure everything! 6. last return it and get your money back and wait for next generation PS4 comes out or get Xbox one but that needs an online update right out of the box to work.